
Why Your New Window Tint Looks Cloudy and How It Cures Properly

Fresh window tint can look a little alarming at first. The car leaves the appointment with sleek new film, but then certain windows may show a light haze, small bubbles, a cloudy patch, or tiny pockets that were not visible before. That does not automatically mean something went wrong.
In most cases, this is a normal part of the curing process.
Window tint is installed using moisture. That moisture helps the technician position the film, work it into place, and remove as much solution as possible before the final finish sets. Some of that moisture can remain trapped between the glass and the film for a short time. As the film cures, the sun and heat help that water evaporate.
The key is understanding what is normal, what needs patience, and what may need a closer look after the film has had time to cure.
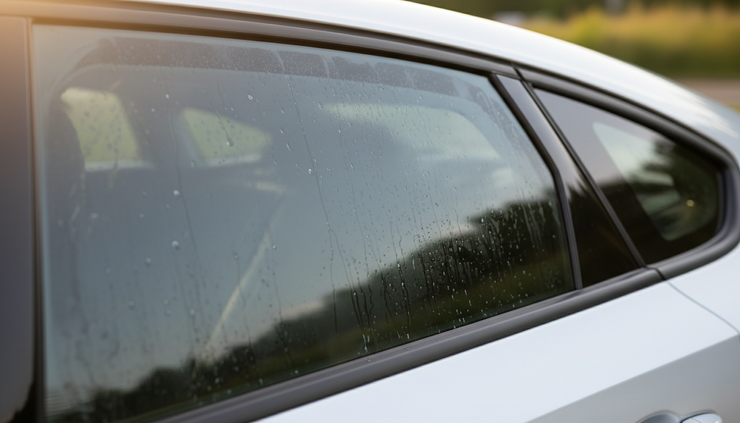
Cloudy tint is often just trapped installation moisture
A professional window tint installation is not dry-applied. A slip solution is used during the process so the film can be positioned smoothly on the glass. Without that moisture, the film would grab too early, making proper alignment and squeegee work much harder.
After the film is placed, the technician removes as much solution as possible. Even with careful squeegee passes, a small amount of water can remain behind the film.
That leftover moisture may show up as:
A cloudy or milky appearance
Light haze across part of the window
Small water bubbles
Slight streaking under the film
Patches that look uneven in certain lighting
This is especially noticeable right after installation, when the film is still fresh and the adhesive has not fully bonded to the glass.
The good news is that temporary water bubbles are expected during curing. They usually shrink, lighten, and disappear as the film dries. The adhesive needs time to settle, and the water needs a path to evaporate through the film and around the edges.
On warm, sunny days, this can happen fairly quickly. In cooler, cloudy, humid, or rainy weather, it can take longer. A full cure may take anywhere from a few days to a couple of weeks depending on the weather, the vehicle, the film type, and how much sun the glass receives.
Water bubbles and air bubbles are not the same thing
Not all bubbles mean the same thing. One of the most common questions after a tint appointment is whether a visible pocket is water, air, dust, or something else. The difference matters because some marks cure out naturally while others may remain.
Temporary water pockets usually change over time
Water pockets are part of the drying process. They often look soft, smooth, or slightly hazy. They may appear like small blisters under the film, but they usually do not have a sharp edge or a hard outline.
A good sign is movement over time. If the spot becomes smaller, lighter, flatter, or less noticeable after a few sunny days, it is likely trapped moisture that is curing out.
Normal water-related curing signs include:
A misty look that improves day by day
Small bubbles that slowly shrink
Haze that is more visible from certain angles
Moisture pockets near edges or curved glass
A cloudy appearance that clears with warmth and sunlight
These effects can look more obvious in direct sun, parking lot lighting, or when looking through the glass at an angle. That does not mean the film is failing. It means the moisture is still working its way out.
Air pockets tend to look sharper and more fixed
Permanent air pockets are different. They usually look more defined and do not change much with time. Air can be trapped if the film does not fully contact the glass in a certain area, especially around imperfections, tight curves, or edges.
Air pockets may look like:
A clear bubble with a crisp border
A bubble that does not shrink after the cure period
A raised area that stays the same size
A pocket near an edge that appears to lift
A spot that looks dry inside rather than hazy
Air pockets are less likely to disappear on their own once the film has cured. That is why it is best to wait through the recommended curing period before judging the final result. During the first few days, many water pockets can look more concerning than they really are.
Contamination looks different from moisture
Contamination means something small became trapped between the film and glass. This could be a dust speck, a tiny fiber, pollen, lint, or another airborne particle. In mobile tinting, the environment plays a major role, even when the technician works carefully.
Contamination often looks like a tiny dot, grain, or raised speck. It usually does not fade like moisture. It may be more visible from the inside looking out, especially when sunlight hits the glass.
A few tiny particles can happen with any real-world installation. The goal is always to keep them as limited as possible, but the conditions around the vehicle can affect what is physically possible.

Sunlight and time are part of the cure
The cure process is not instant. Window tint adhesive needs time to bond properly, and moisture needs time to leave the glass.
Sunlight helps. Heat warms the glass and encourages evaporation. That is why a vehicle parked in warm, dry conditions may cure faster than one kept in a shaded garage during cool or rainy weather.
A typical curing window can range from a few days to a couple of weeks. That range is normal because every situation is different.
Cure time may be affected by:
Outdoor temperature
Sun exposure
Humidity
Rainy or cloudy weather
Vehicle storage in a garage or shade
Type of glass
Type and thickness of film
Amount of moisture left from installation
A back window with defroster lines may cure differently than a front roll-up window. A small curved quarter glass may dry differently than a large side window. Ceramic film can also have its own drying behavior depending on the product and conditions.
During this phase, patience matters. Pressing on bubbles, picking at edges, wiping the inside too soon, or rolling windows down early can interfere with the adhesive before it has settled.
The best thing to do during the curing period is simple: leave the film alone, keep the windows up, and let sunlight do its work.
Mobile window tinting happens in the real world
UniCres brings premium ceramic window tinting directly to the client’s location. That convenience is a major benefit. The vehicle does not have to be dropped off at a shop for hours, and the installation can happen at a home, workplace, or another suitable location.
That also means the installation happens in an open environment.
A mobile tint setup is not a sealed factory cleanroom. It cannot control every particle in the air, every breeze, every passing insect, or every bit of dust moving through the area. Even a space that looks clean can have airborne material floating around.
Common environmental factors include:
Floating dust
Light debris
Airborne pollen
Wind movement
Humidity
Nearby landscaping
Ambient insects or bugs
Fibers from the vehicle interior
Static that attracts particles to glass or film
These factors are dynamic. A calm area can become breezy. Pollen can shift with the weather. Tiny insects can appear suddenly. Dust can come from a nearby road, driveway, parking lot, or even from the vehicle itself.
That reality does not mean the installation is careless. It means mobile tinting requires skill, awareness, and precision because the environment is active.
UniCres technicians use careful preparation, clean handling, proper film placement, and precise squeegee techniques to get as close to flawless as physically possible. The goal is always a clean, smooth, professional result. At the same time, no mobile installation can be 100% factory-sterile because the work takes place where real air, weather, and surroundings exist.
This honest expectation helps prevent unnecessary worry. A small amount of dust or a tiny speck should not be confused with a failed installation. The film can still perform, look excellent, and provide the heat rejection, comfort, and appearance expected from premium ceramic tint.

What to avoid while the tint is curing
Aftercare makes a real difference. The first few days are when the film is most vulnerable because the adhesive is still setting and moisture is still escaping.
The most important rule is to keep the windows rolled up for the full specified curing period. If a technician gave a specific time frame, follow that instruction. Rolling a window down too soon can catch the film edge, shift the film, cause peeling, or create marks before the adhesive has bonded.
During the curing period, avoid:
Rolling windows down
Pressing on bubbles
Picking at film edges
Scraping the inside glass
Using suction cups or mounts on tinted glass
Applying stickers or decals over the film
Cleaning the inside of the windows too early
Using harsh chemicals near the film
It can be tempting to push a bubble with a finger or try to wipe away haze from the inside. Do not do it. If it is moisture under the film, surface wiping will not remove it. If the film is still curing, pressure can make things worse.
Let the film settle naturally.
How to clean tinted windows safely
Once the curing period has passed, cleaning becomes simple. The key is using products and materials that will not damage the film.
Use ammonia-free glass cleaner only. Ammonia can be harsh on tint film and may affect the adhesive or appearance over time. Many standard household glass cleaners contain ammonia, so check the label before spraying.
Use a soft microfiber towel. Avoid paper towels, abrasive pads, rough shop rags, brushes, or anything that can scratch the film.
A safe cleaning routine looks like this:
Wait until the curing period is complete.
Spray ammonia-free cleaner onto a microfiber towel, not directly onto the film.
Wipe the inside glass gently.
Use a second clean microfiber towel to dry the surface.
Clean edges carefully without pulling at the film.
Spraying the towel first helps prevent cleaner from soaking into film edges or dripping into door panels. Gentle cleaning is enough. Tint film does not need heavy scrubbing.
For routine maintenance, a light wipe is usually all that is needed. If fingerprints, smudges, or interior haze build up, clean them with the same ammonia-free method.
When to give the tint more time and when to ask for a review
Most cloudy windows improve with time. A good way to judge the film is to observe it over several days instead of inspecting every tiny mark immediately after the appointment.
Give the tint more time if:
The haze is fading
Bubbles are getting smaller
The cloudy look is improving
The weather has been cold, rainy, or humid
The vehicle has not had much sun exposure
The spots look soft or watery
After the full curing period, take another look in natural daylight. Check the windows from inside and outside. Some tiny specs may only appear at a certain angle, while normal glass reflections can sometimes be mistaken for film issues.
Reach out for a professional review if:
A bubble stays the same size after curing
An edge begins to lift
A large dry pocket remains
A sharp air bubble does not change
A noticeable piece of debris is trapped in a high-visibility area
The film appears creased, folded, or damaged
The timing matters. Looking too early can lead to false alarms because the film has not finished drying. Waiting through the full cure gives a much clearer picture of the final result.

A clear finish takes patience
New window tint goes through a short settling period before it reaches its finished look. Small water bubbles, haze, and a cloudy appearance are usually normal because moisture is part of the installation process. As the film cures in the sun, that moisture evaporates and the tint becomes clearer.
The most helpful steps are simple. Keep the windows up for the specified curing period. Do not press or pick at the film. Avoid cleaning too soon. Once cured, use only ammonia-free glass cleaner and soft microfiber towels.
Mobile tinting also comes with real-world environmental limits. UniCres technicians work carefully and use precise methods to deliver a clean, premium ceramic tint installation, but open-air conditions can never be completely sterile.
A little patience during curing helps protect the final result. Give the film time, let the sun do its job, and judge the finished tint only after it has fully settled.


Comments